
Ghidra is one of the most popular software reverse engineering suites on the market, but there is always a need to add or customize a feature for different situations. Fortunately, Ghidra’s scripting capabilities are powerful and designed to enable users to solve unique problems when analyzing programs. SentinelOne’s VTgrep, for example, is a custom Ghidra scripting tool that has made a huge impact with reverse engineering malware. In this post, we will go over how to install GhidraDev, Ghidra’s API, Building Scripts and my Top 5 Ghidra Scripts.
Using Eclipse IDE Integration with Ghidra
When scripting with Ghidra, the logical choice for editing or creating scripts is the Eclipse IDE. Although Ghidra comes preinstalled with a basic scripting editor which is fine if you want to modify an existing script quickly, the integration that Ghidra provides with the Eclipse IDE is ideal for development and more complex editing tasks due to Ghidra’s plugin into the Eclipse environment. In this section, we will cover how to install Eclipse and get it ready for scripting.
Installation Steps:
- Install Eclipse
- Browse to https://www.eclipse.org/downloads/packages/ and download the Eclipse IDE for C/C++ Developers.
- Unzip the download

- Installing PyDev
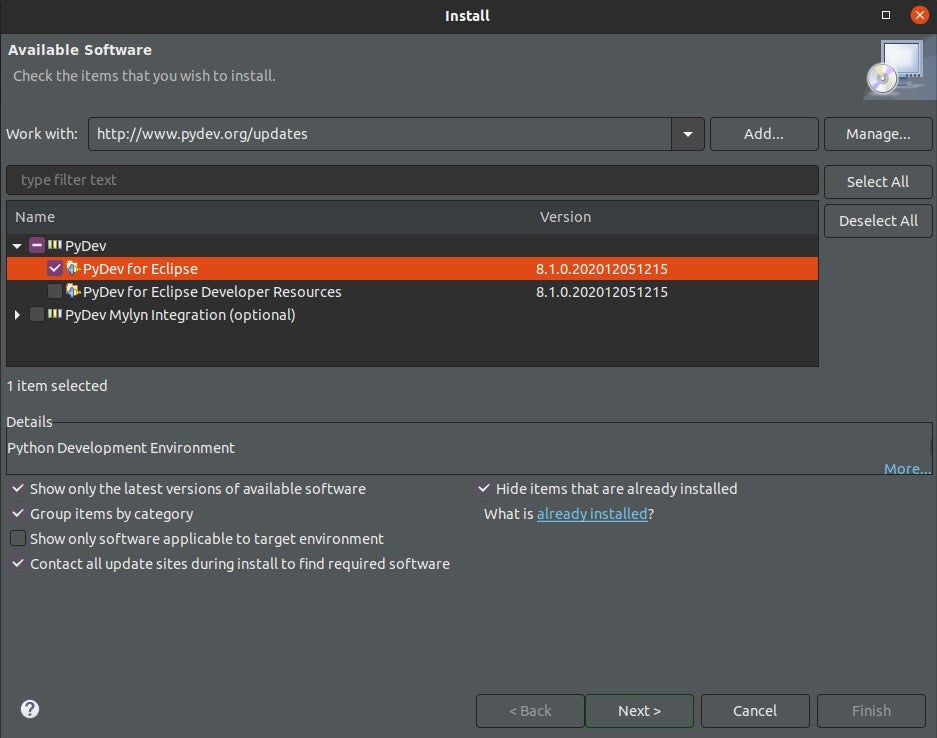
- To install the PyDev Extensions using the Eclipse Update Manager, select Help > Install New Software and enter the following link in the Work with section: http://www.pydev.org/updates.
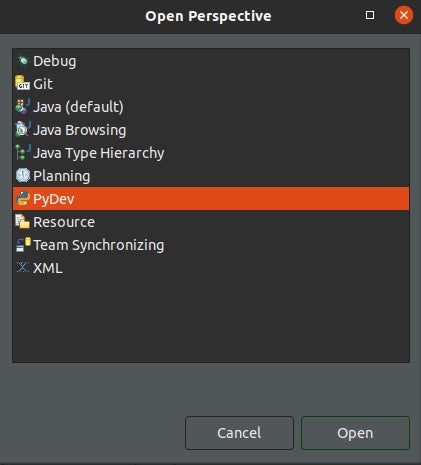
- To confirm that PyDev has installed, select Window->Perspective->Open Perspective->Other, select PyDev and click Open.
- Installing GhidraDev: GhidraDev provides support for developing scripts and modules in Eclipse
- Browse to Help -> Install New Software
- Click the Add button and then click Archive
- Browse the Ghidra directory <path>/Ghidra/Extensions/Eclipse/GhidraDev/, select GhidraDev-2.x.x.zip.
- Click OK -> Check Ghidra category
- Click Next -> Next -> Finish
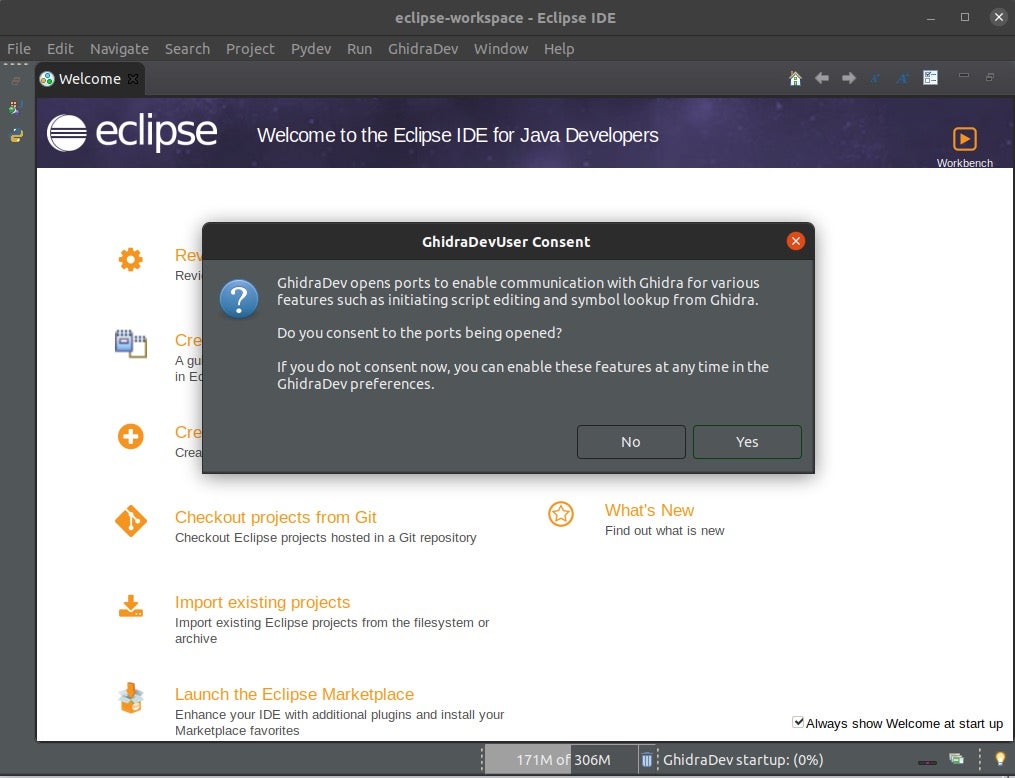
- Make sure to click Install anyway and click Restart Now.
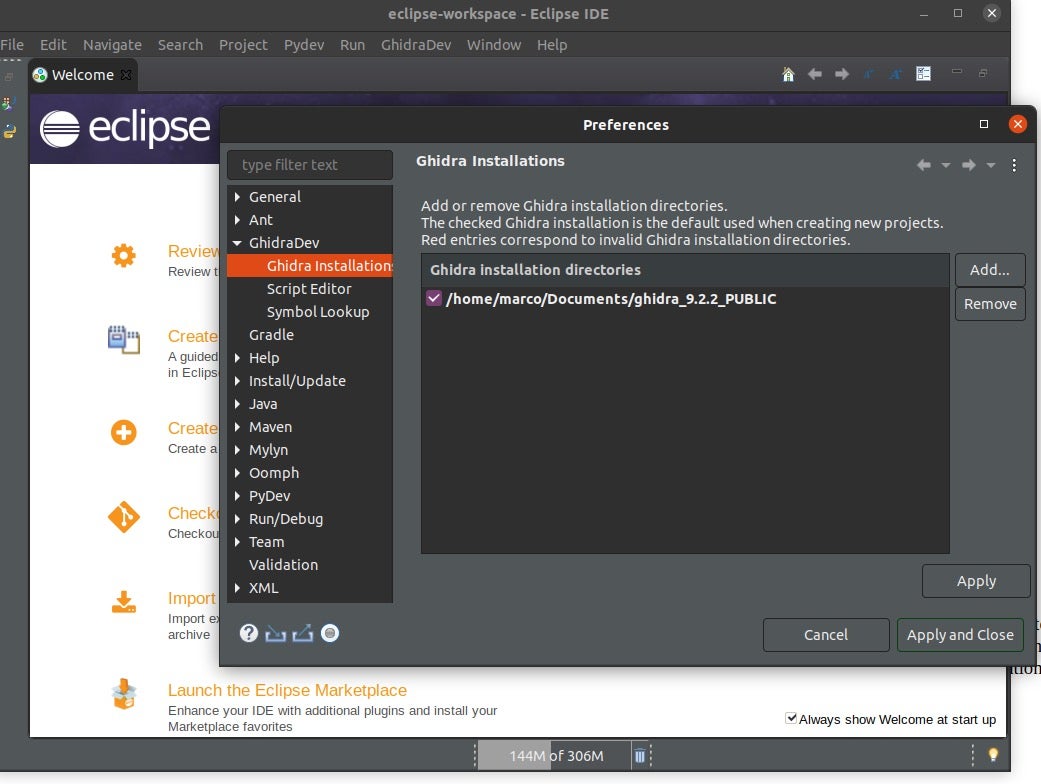
- The next step is to configure the location where Ghidra is installed.
- Browse to GhidraDev->Ghidra Installations.
- Click the Add button and navigate to the location where Ghidra is installed then click Apply and Close.
To make sure that everything has been setup correctly:
- Open Ghidra then open the Code Browser window and navigate to the Script Manager Window->Script Manager, or click on the green play button on the icon bar.
- Next, select
AddCommentToProgramScriptPy.pyand hit the Eclipse button on the top right hand side of the window. - In the Eclipse application, a window opens to Create a New Ghidra Project.
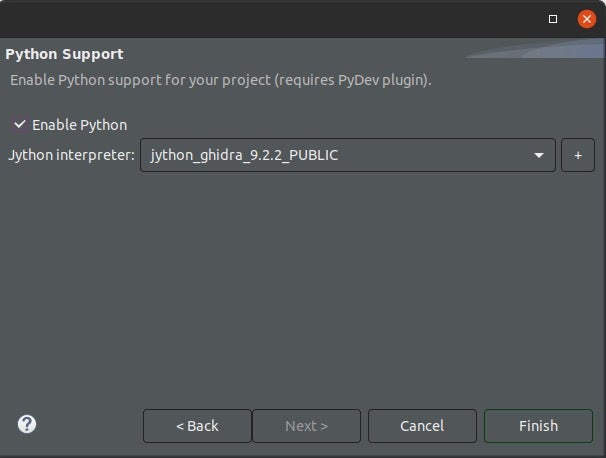
- Click Next -> Next and enable the Jython interpreter that comes with Ghidra and click Finish.
Once this is done, you will be able to view the python script you’ve just opened.
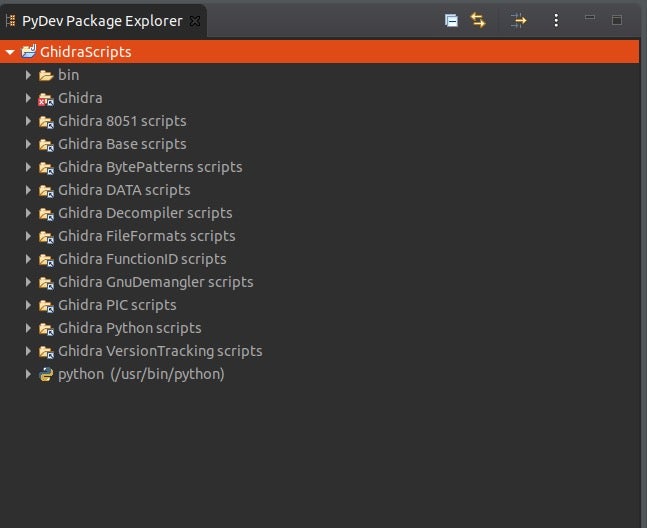
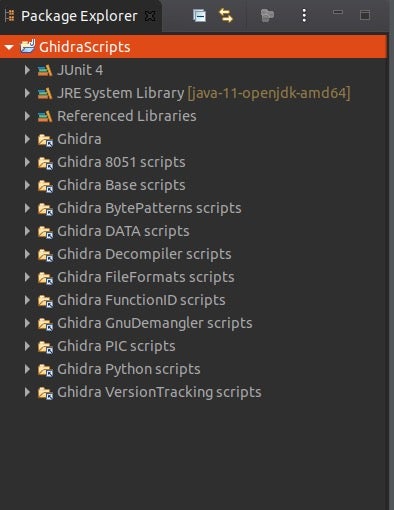
In the left side pane, click the GhidraScripts disclosure button to view the Ghidra scripts already installed:
Ghidra’s API
One of the good things about the Ghidra API is it’s the same for both Java and Python, so you can use the Java scripts that are in the Scripts Manager as a guide to learn how functions are used and how they are called to make your script work. An example would be if you opened ShowCCallsScript.java in Eclipse.
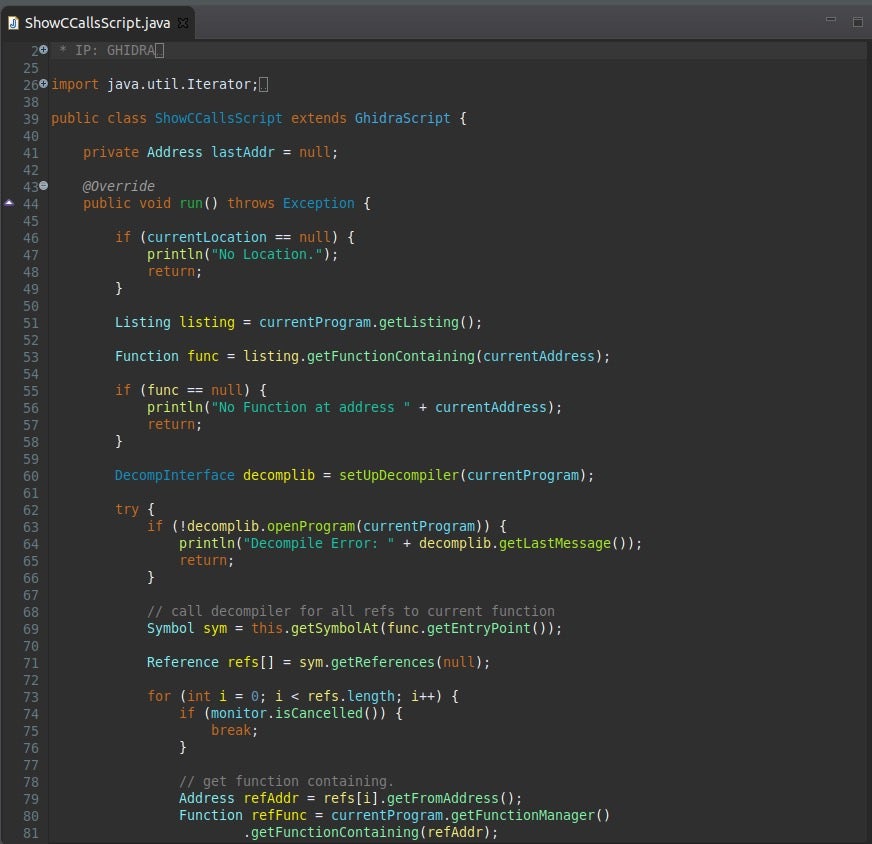
Let’s explore this file as an example of how to dissect Ghidra’s API.
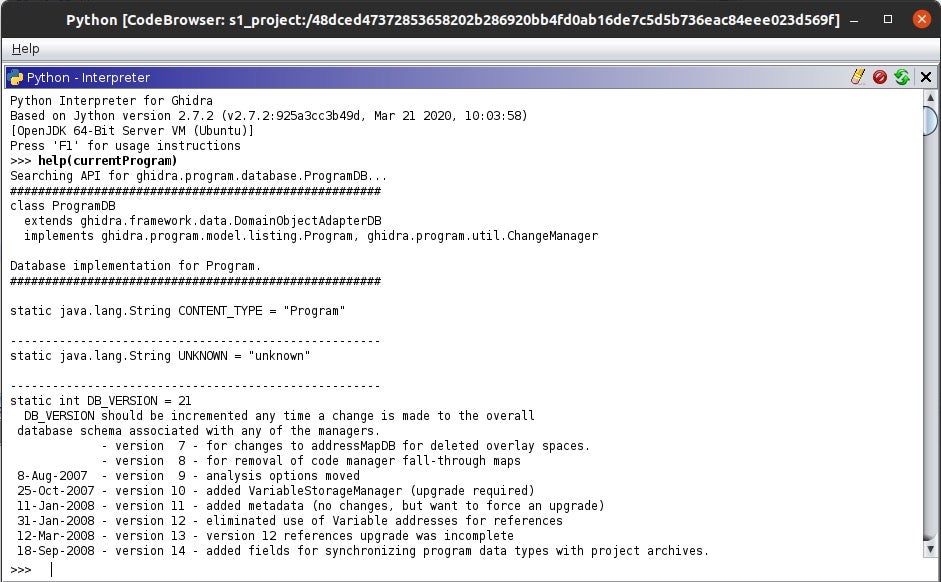
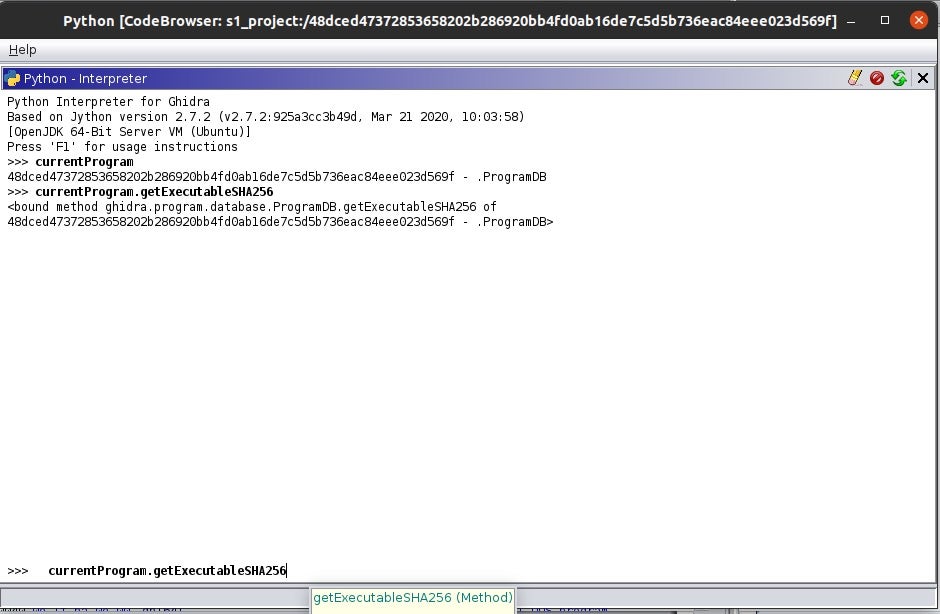
Open Ghidra’s code browser and select Window->Python. Once you’re in the interpreter in Ghidra’s code browser, explore currentProgram in this script, which returns an object containing the program’s hash.
![]()
The way I’ve learned Ghidra’s API was by using the help command in the python interpreter. Type help(currentProgram) to show the capabilities of the call. Ghidra’s API documentation is very informative.
Let’s dig deeper to learn more about the API. Type the same command but add a . and hit tab currentProgram. This allows you to see what you can call in the current program. You can see currentProgram.getListing(), but let’s select something different to understand how it works.
I’m going to select a SHA256 hash to display the hash like the screenshot below. Try hitting the Up button and select something that interests you.
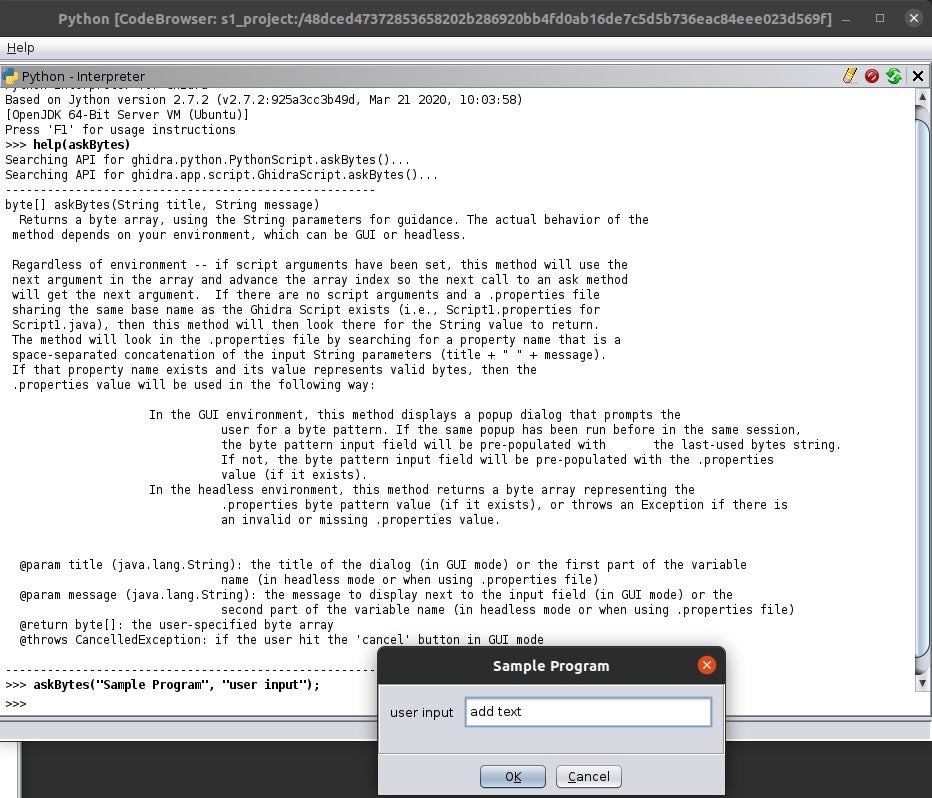
The last example that I will give of the Ghidra API is how to get user input when working with scripts. The askBytes() function takes two arguments. The first argument is the title of the popup box and the second is the message to display next to the input field. I constantly use askBytes() for plugins that I write because it’s so handy when I need to add something. I will demonstrate this in the next section.
There are many resources online showing examples on how to work with Ghidra’s APIs. For the final piece of this section I will go over some of the commonly used Ghidra API methods that I use.
currentProgram.getExecutablePath(): gather information about the current program within a projectcurrentProgram.getName(): return the loaded program’s namecurrentProgram.getMemory().getBlocks(): return a list of all memory blocks that contain any addresses in a given rangegetFirstFunction(): retrieve the first function in the loaded binarycurrentProgram.getFunctionManager(): manage all functions within the programgetGlobalFunctions(String Name): return a list of all functions in the global namespace with the given nameDirectedGraph(): creation of various graph structures including directional graphs and much moreDecompInterface(): a self-contained interface to a single decompile process, suitable for an open-ended number of function decompilations for a single program. I highly recommend looking at the API docs to dig deeper into this because it could be a blog post by itself.
Building Ghidra Scripts
Early in my reverse engineering career, I had a mentor that gave me a great tip. What he shared with me has stuck with me ever since, which was that for any task that you do find yourself doing three times, you must figure out a way to automate it. After that recommendation, I’ve always had the habit to build scripts to help me with mundane tasks. In this section, we will build some simple but useful scripts that will help with mundane tasks while reverse engineering.
Adding to an Existing Script
For this example, you will need to install the binwalk tool and ensure that it is in your $path. For Ubuntu, use apt-get install binwalk; for Mac users either sudo port install binwalk (for MacPorts) or brew install binwalk (for Homebrew); Windows users should follow this link for further instructions.
Browse to the binwalk plugin repo on github and download or copy the text, then add it to your python scripts folder /GhidraScripts/Ghidra Python Scripts. Download a random firmware binary. If you don’t know where to download firmware, a simple web search for “firmware downloads” will return a number of options.
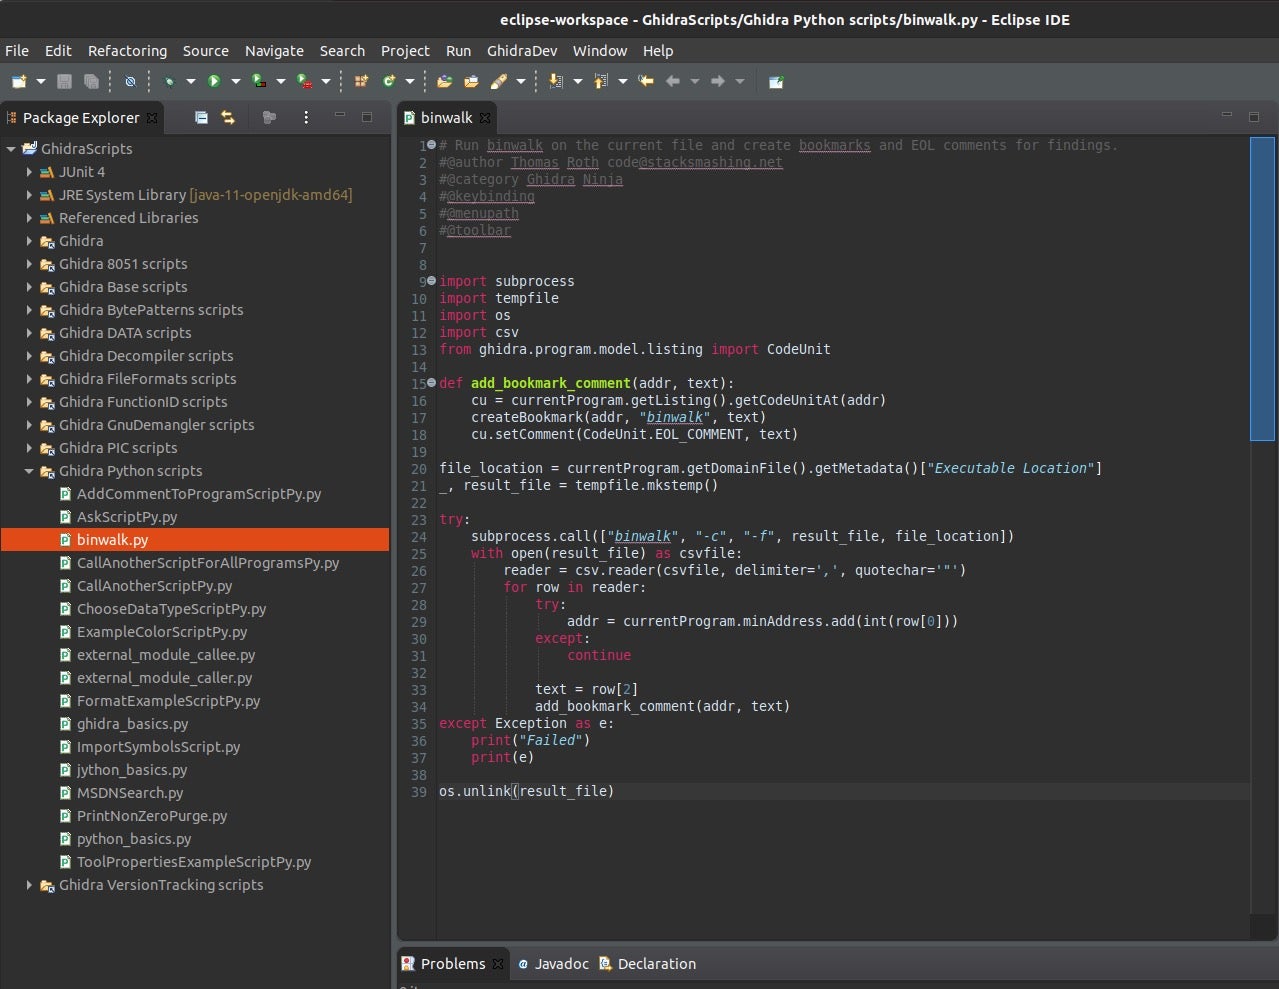
Add the binwalk.py file into the Ghidra Python scripts folder, and open up Eclipse IDE->Ghidra Python scripts->binwalk.py.
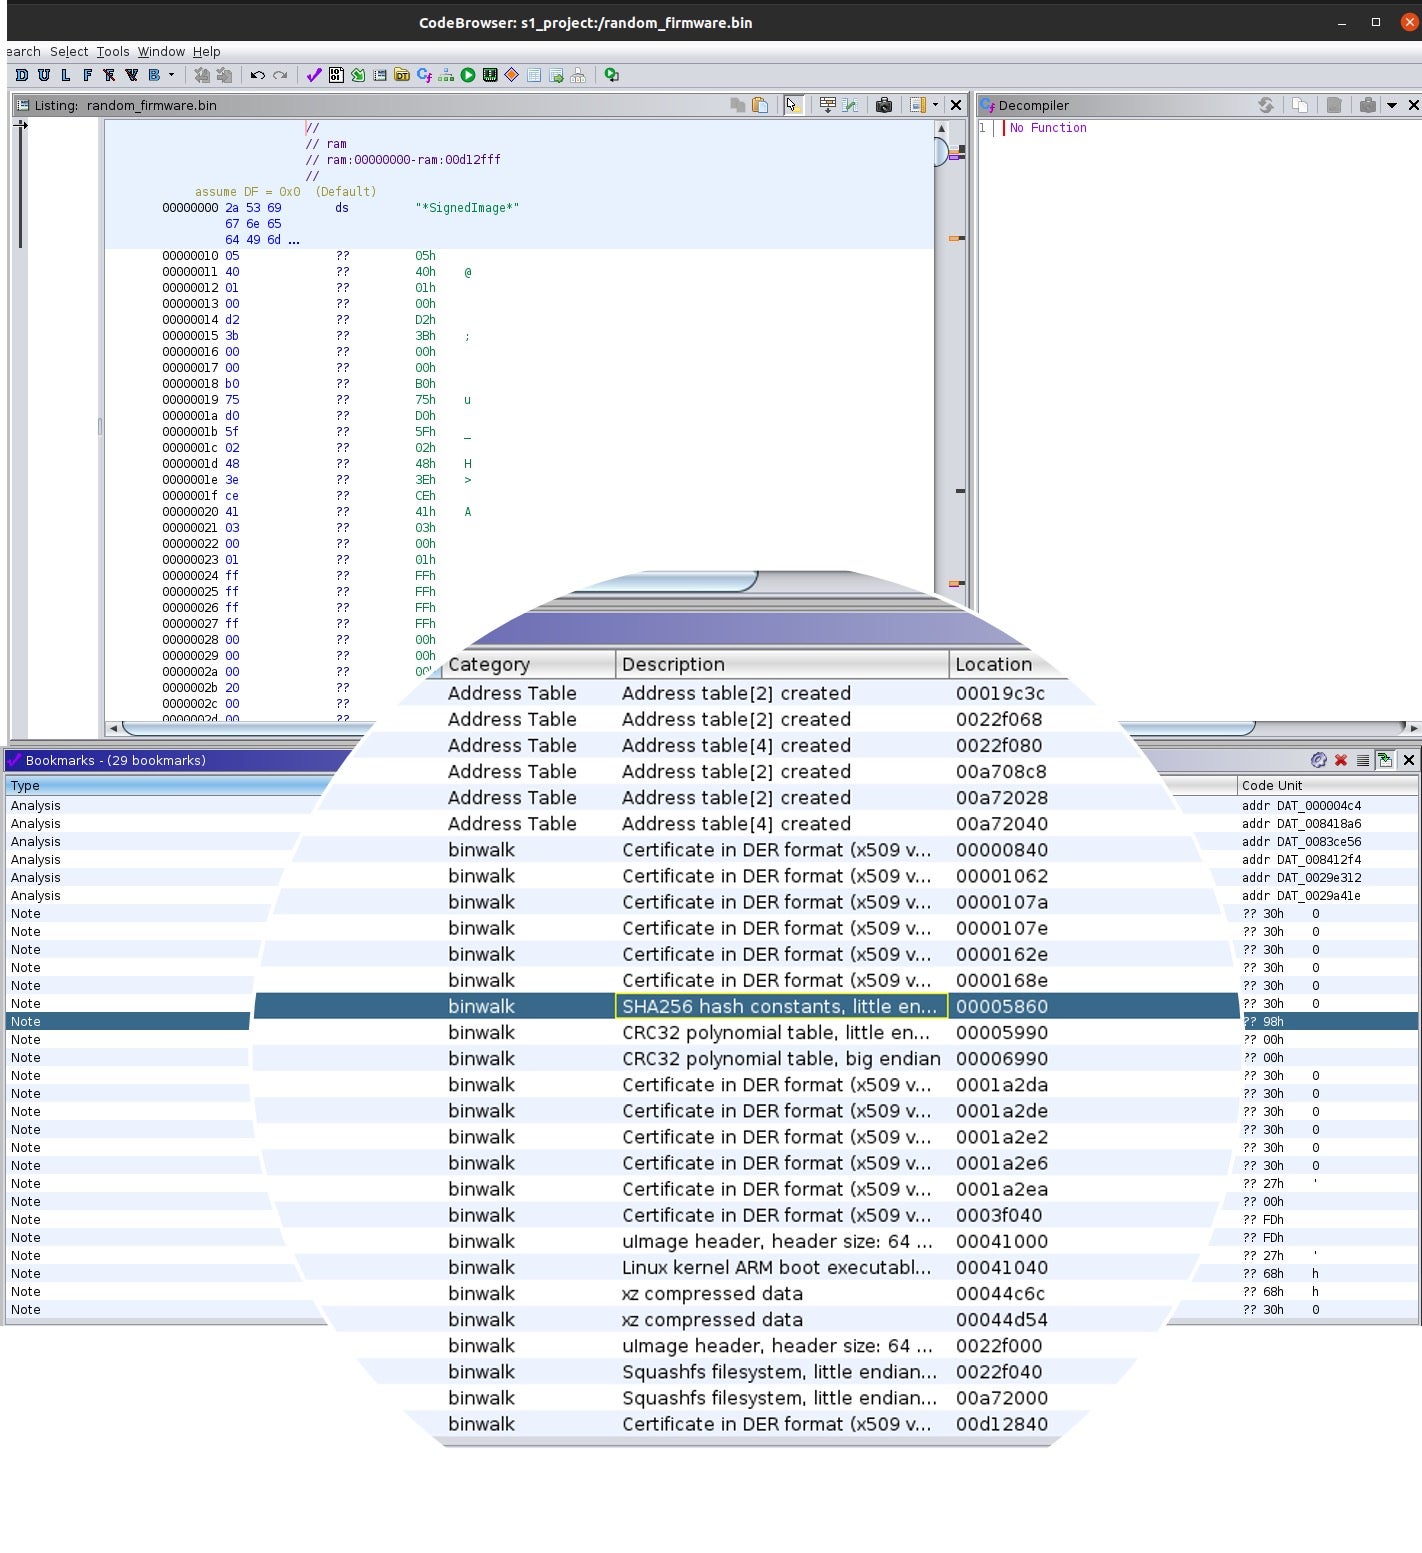
Load the downloaded firmware that you’ve selected and open the code browser, then Scripts and find binwalk.py and run the script.
If you look at the script, the subprocess call runs the -c switch, which logs results to the file in a CSV format, and the -f switch, which logs the results to a file. This useful script bookmarks things it finds, as the picture below shows, with the Category name “binwalk”, a description, and a location.
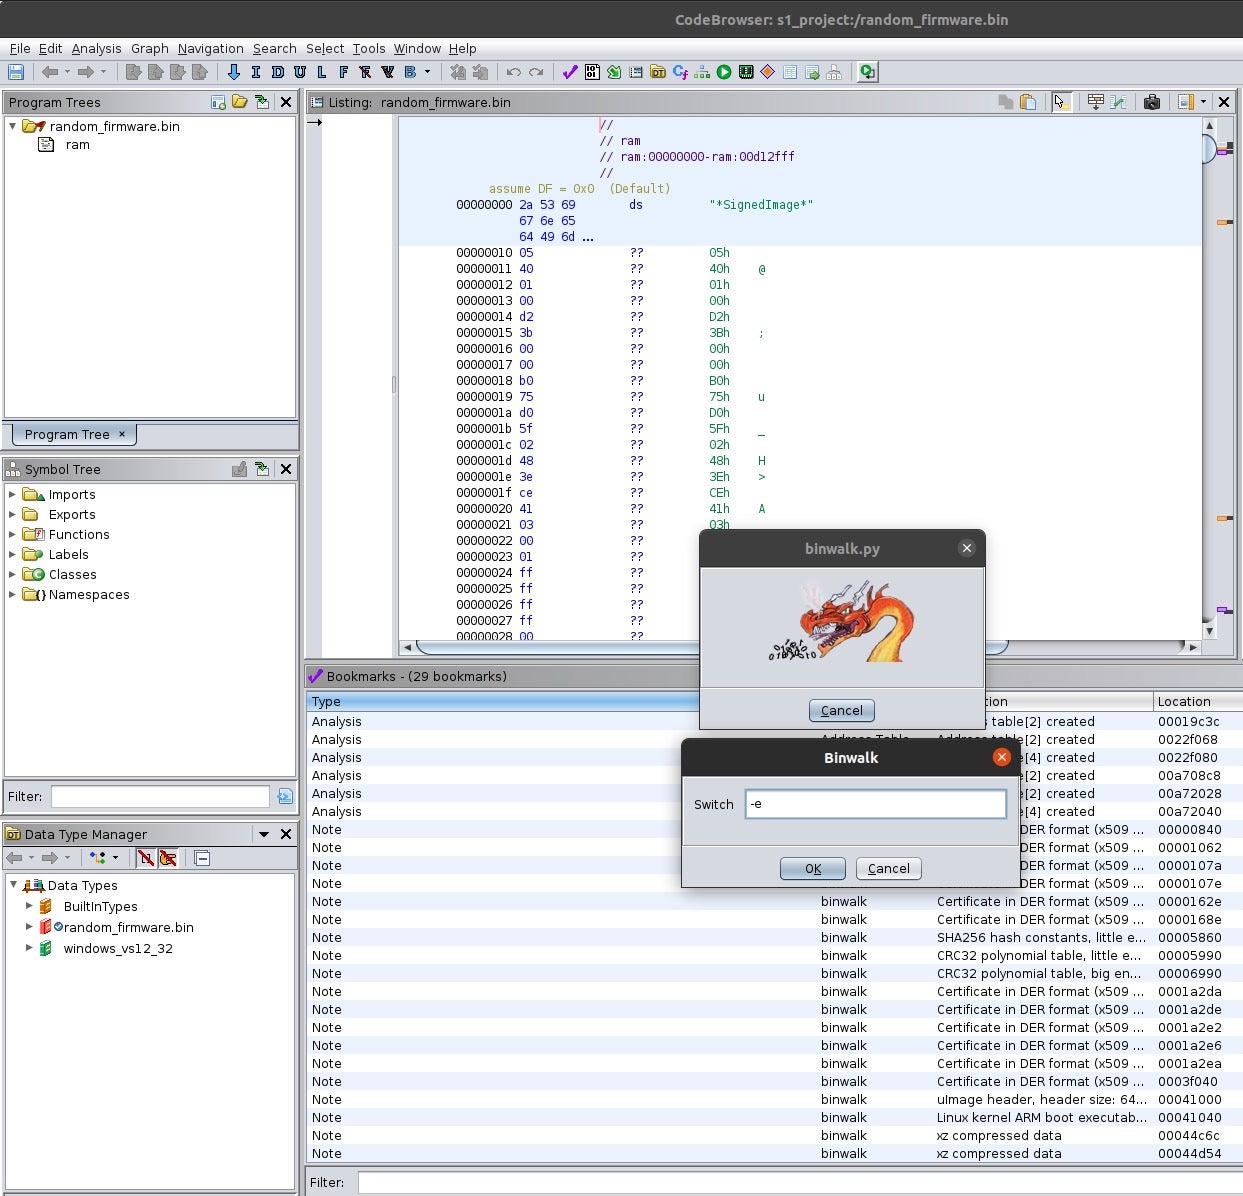
Next, we are going to create a function that allows the reverse engineer to specify a switch for the binwalk to read and execute the input. Instead of just writing the code, I’m going to show you the screenshots and with what you’ve read in this post, you should be able to finish the script without me writing the code for you.
The screenshot below is a popup to enter the switch -e, which extracts any files that it finds in the firmware image. The next thing you have to do is to point it to a directory where the file is located and save all the files into that folder.
Explore the Existing Ghidra Scripts
Great! We’ve seen how easy it is to add and edit scripts, but there are naturally many useful scripts already included in Ghidra. No one wants to waste time reinventing the wheel, so let’s see what we already have at our disposal.
Let’s begin with the folder structure:
- JUnit4 is an open source unit-testing framework for writing repeatable tests in Java.
- JRE System Library is a folder that gets automatically added once Java Projects are created.
- Referenced Libraries are libraries that are associated with Ghidra
- Ghidra is where the the ghidra installation is located
- Ghidra * scripts are folders where you’ll find the collection of existing scripts. There are over 100 scripts and many of them are very useful, so as noted above, check out what’s here before investing your time writing something that may already have been written for you!
- VTGrep: https://github.com/SentineLabs/VTgrepGHIDRA
This plugin integrates functionality from VirusTotal web services into the GHIDRA’s user interface. The current version is v0.1, This plugin is not production-ready yet, and unexpected behavior can still occur and released without any warranty. This release integrates VTGrep into GHIDRA, facilitating the searching for similar code, strings, or sequences of bytes. Watch the how to video to understand how to use VTGrep. - Binwalk: https://github.com/ghidraninja/ghidra_scripts/blob/master/binwalk.py
Runs binwalk on the current program and bookmarks the findings. Requires binwalk to be in $PATH. - Yara: https://github.com/0x6d696368/ghidra_scripts/blob/master/YaraSearch.py
This Ghidra script provides a YARA search. It will place a PRE_COMMENT at the location of each match. It will set bookmarks for each match. - Golang Renamer: https://github.com/ghidraninja/ghidra_scripts/blob/master/golang_renamer.py
Restores function names from a stripped Go binary. - Daenerys: https://github.com/daenerys-sre/source
Daenerys is an interop framework that allows you to run IDAPython scripts under Ghidra and Ghidra scripts under IDA Pro with little to no modifications.
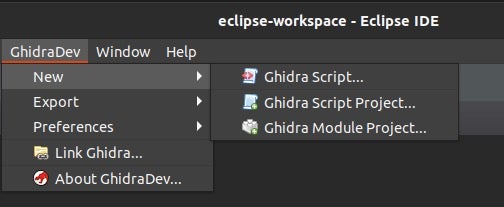
I’m going through this because I feel it’s important, but for creating new scripts I usually just go to the Ghidra Python scripts folder and create a python file. Alternatively, you can go GhidraDev->New->Ghidra Script, which allows you to enter the script name, script type, Script author, Script category and Script description. Creating a Ghidra Script Project allows you to enter a project name, select the Project root directory and create a run configuration. This feature is good if you were creating multiple scripts.
The last one is creating a Ghidra Module Project, which collects code from Ghidra Module template and adds it to your newly created module.
Let’s Write Our First Complete Ghidra Script
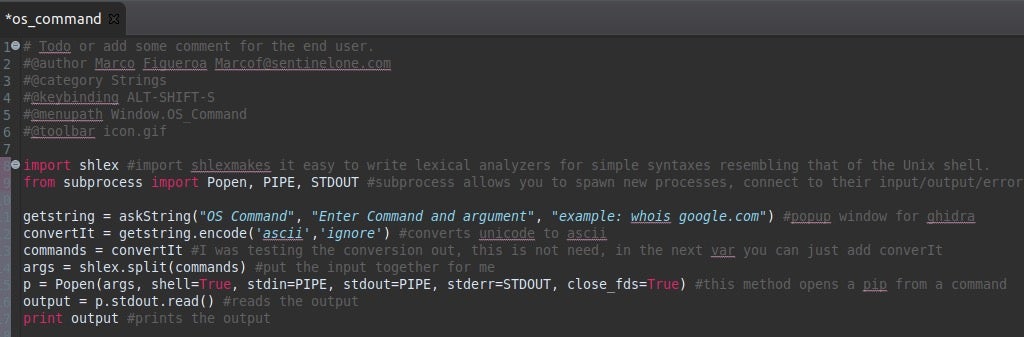
With that being said, go to your Ghidra Python Scripts folder, right click on the folder and create a file and name it os_command.py.
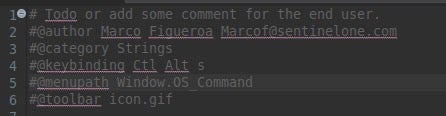
The script’s metadata is important for the end user of the script, so the first thing we want to add is some lines to the beginning of the python script.
The first line is where you would add your metadata comment on how you would use the script, which will allow the end user to read the comments by clicking on the script in the Script Manager’s window.
Next, you can optionally add the author’s name.
The third line is for the Category, which allows you to set where the script will be saved to in the Script Manager’s window.
The menupath is the top-level menu path for the script and the last option to add is toolbar, which allows you to create an icon for the script. The image will appear on the toolbar as a button to launch the script.
The next step is to write the script that you want to create. For this script, we want to write a script that will run a command locally. When reversing malware, I usually run a whois on domains and IP addresses that I find. The following screenshot shows the code with comments so that you can understand the purpose of each line.
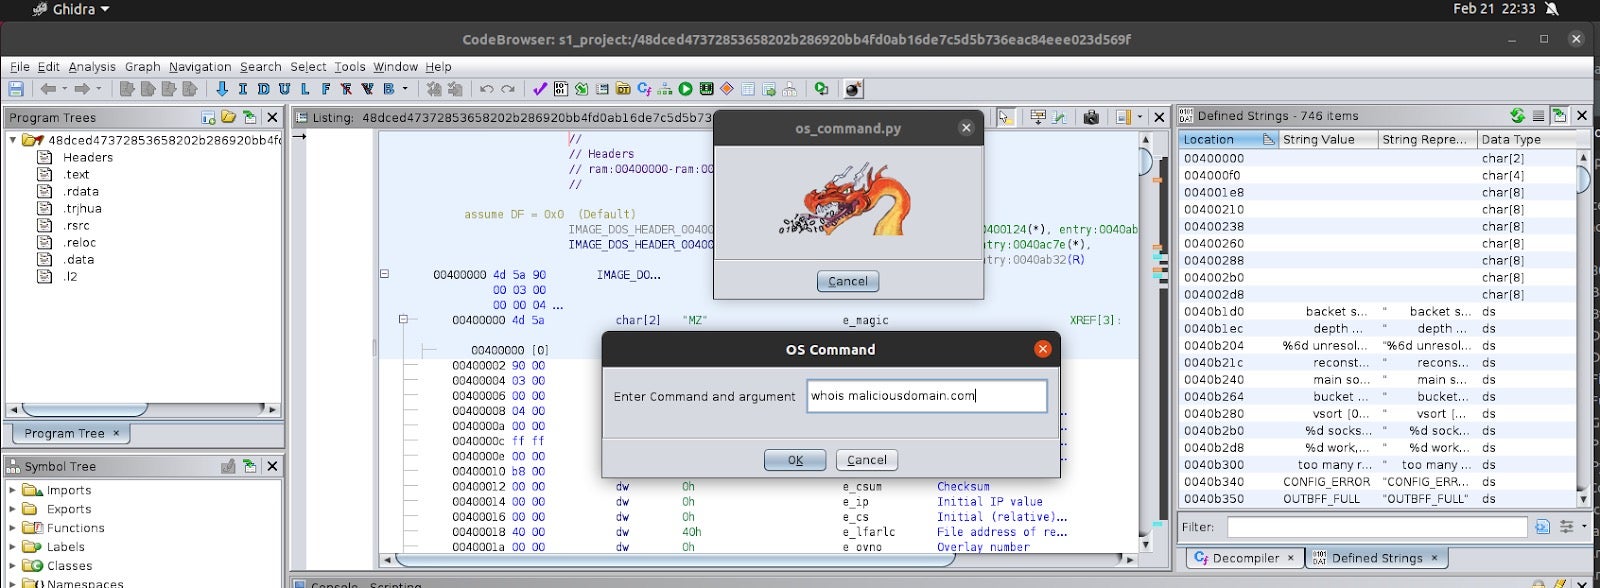
After saving this code, if you browse to the Script Manager window in Ghidra, you will see the os_command.py file, with the metadata information you provided in lines 1-6 displayed.

To use the script, enter any OS command of your choice and the Ghidra script will run it and output the results in the console window.
Top 5 Ghidra Scripts
So, that’s a short intro to get you started with the incredibly useful world of Ghidra scripting!
As I’ve said above, automation is really the key to becoming a more effective and productive malware analyst, and Ghidra scripting is an essential tool in your arsenal.
Above, we also learned that there are many scripts provided by default in the Ghidra installation, meaning you don’t have to develop everything from scratch and you can learn from the scripts provided.
Finally, I want to end with my top scripts for malware research using Ghidra. I have no doubt you will find them as incredibly useful on a daily basis as I do. Check them out: